Garrattfan's Modelrailroading Pages

B&O EM-1
Applying lettering and numbering
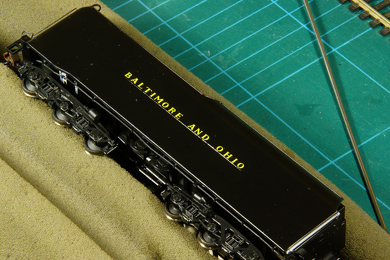
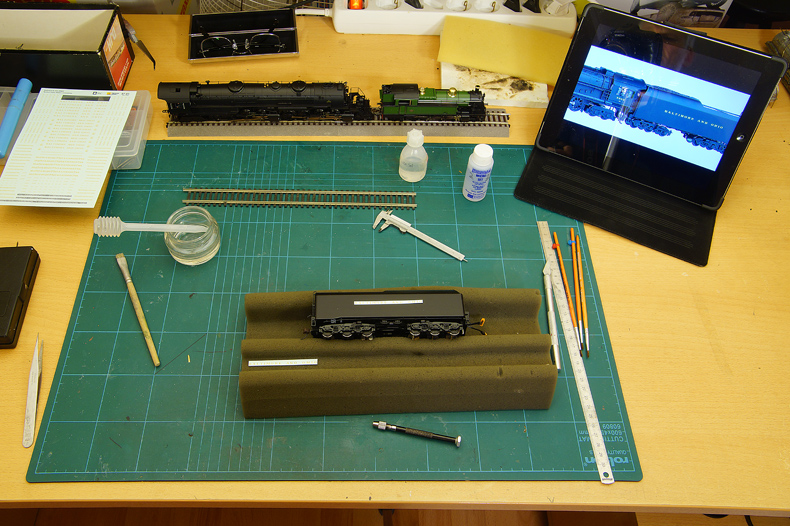
First a shot of my work desk. I have described decalling in detail during my MDC Roundhouse Shay project. So if you are looking for detailed information how to do that you are invited to visit the particular sections about decalling and lettering |
|
 |
The decal is liftd out of its bath of water with my good old spatula, which I got for my chemistry education at the end of the '70s, and a soft brush. The spatula because it is firm yet has no sharp edges, the brush because it is soft and can be used to apply the most delicate of forces to get the decal in place.
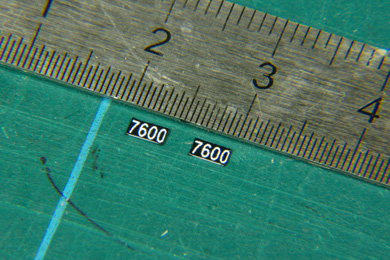
It is then laid rougly on the spot where it is to come and then carefully and patiently moved into place with the brush. With such a long decal it is important to lay the decal flat and straight. Careful measuring and checking against a ruler is no luxury. |
 |
Well, that's better. The rims are still quite visible, but is because the decal softener has not been applied yet. |
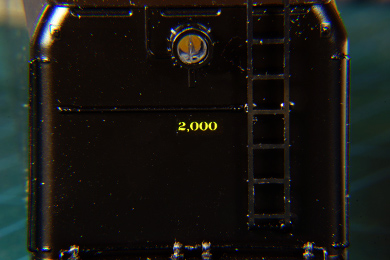 |
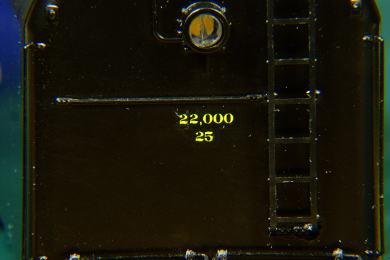
The tender's meaures are lettered on the back. This particular tender should read 22,000 (gallons of water, appr. 83 cubic metres) and 25 (tons of coal).
|
 |
I added a 2 that was isolated from a 20,000 gallon mark.
And finally I added the coal capacity mark |
A bit of cleaning up and the tender is done
|
|
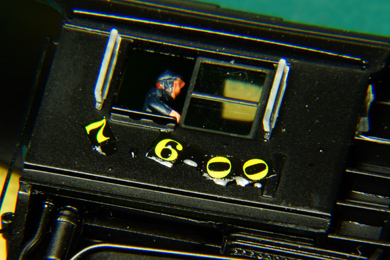 |
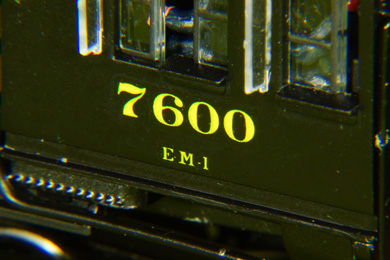
Next is the numbering of the cab. I chose 7600, the class leader's number. |
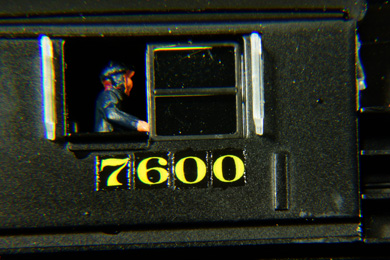 |
After setting of the decals.
A clear distinction is now visible but after several treatments with Micro Sol and Micro Set they are almost invisible |
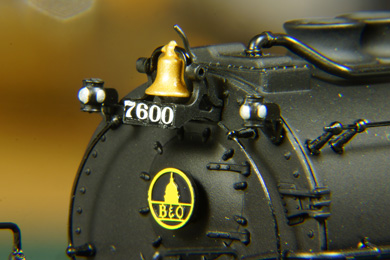 |
The road number on the smokebox posed very little problems. The photo seems to betray a difference in height between the number pairs 76 and 00 but believe me, with naked eye you can't see it. |
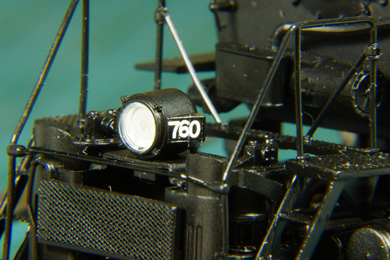 |
The numbers beside the headlamp were a pain though. There was just not enough room for four digits. |
 |
I removed them and printed number boards on photo paper |
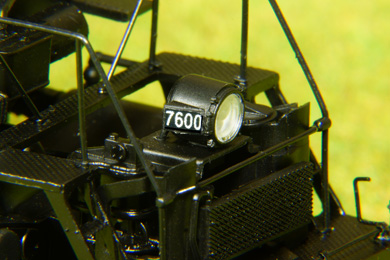 |
and glued them in place with simple household glue |
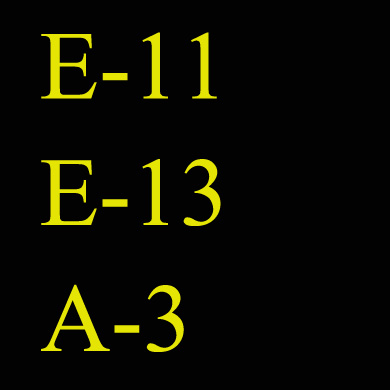
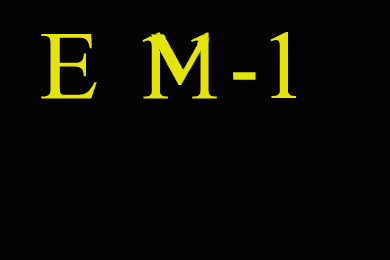
The class designation below the roadnumber on the cab posed a bit of a challenge. The decal sheet did not contain the EM-1's designation. Actually, it did not contain an M at all. So I had to assemble it from the available material. |
|
 |
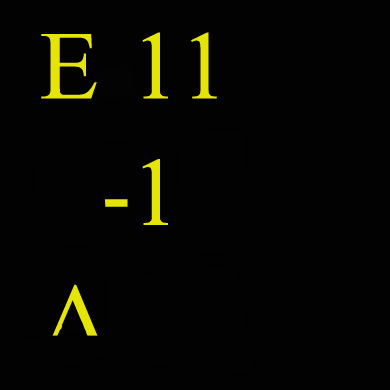 |
I combined three different class designations, taking the E-11 as a starting point
|
As a next step I
|
 |
 |
| I moved the schortened A to the and turned it upside down | There you go
|
 |
 |
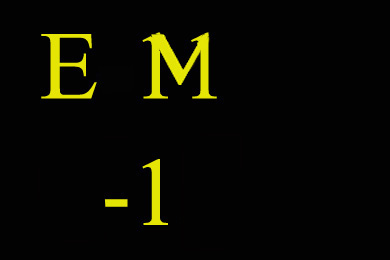
| and moved the -1 into place | Done. Not perfect but good enough for the naked eye. These letters are about 1.5 mm high!
|
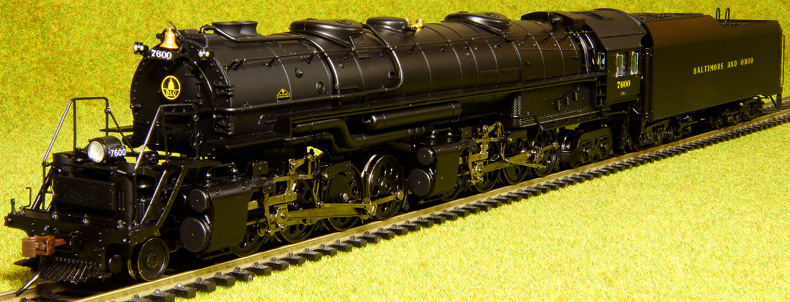
This is the end result |
|


Sign my
GuestBook